
Submitting an HTML5 Contact Form to a MySQL Database with PHP and JQuery Ajax


It is a common task for many developers like you and I to build contact forms that sends data to a MySQL database.
In this tutorial, I'll show you how to create an HTML5 contact form and submit it using PHP and jQuery Ajax. This will allow you to save user input to your database without needing to reload the page. By the end of this guide, you’ll have a working form that can send data and display a success message. Let’s get started!.
What You'll Need For This Process
A windows computer
I assume that you already have your project folder containing the basic html, css or and js files for your we page so without further ado, let's get down to business
Creating the PHP file
Go to xampp control panel , start Apache server and mySQL. Now move your project folder to xampp/htdocs if you haven't done that already. Open up your project folder in VS code and create a new file named 'form.php' (you can name this anything else, doesn't matter). You should be able to view your page on localhost/sitename.
In your form, add the action attribute and set it to 'form.php'.
<form id="subscribers" action="form.php">
    <input type="email" id="email" placeholder="Your email..." name="email">
    <input type="submit" value="Subscribe">
</form>
Getting the email data on form submit
In your form.php, write the codes to get the email data on form submit and store them in a variable.
<?php
  $email = $_POST['email'];
?>
Easy right? Now let us create a database on xampp phpMyAdmin so we can get the details we need to setup a db connection.
Creating the database.
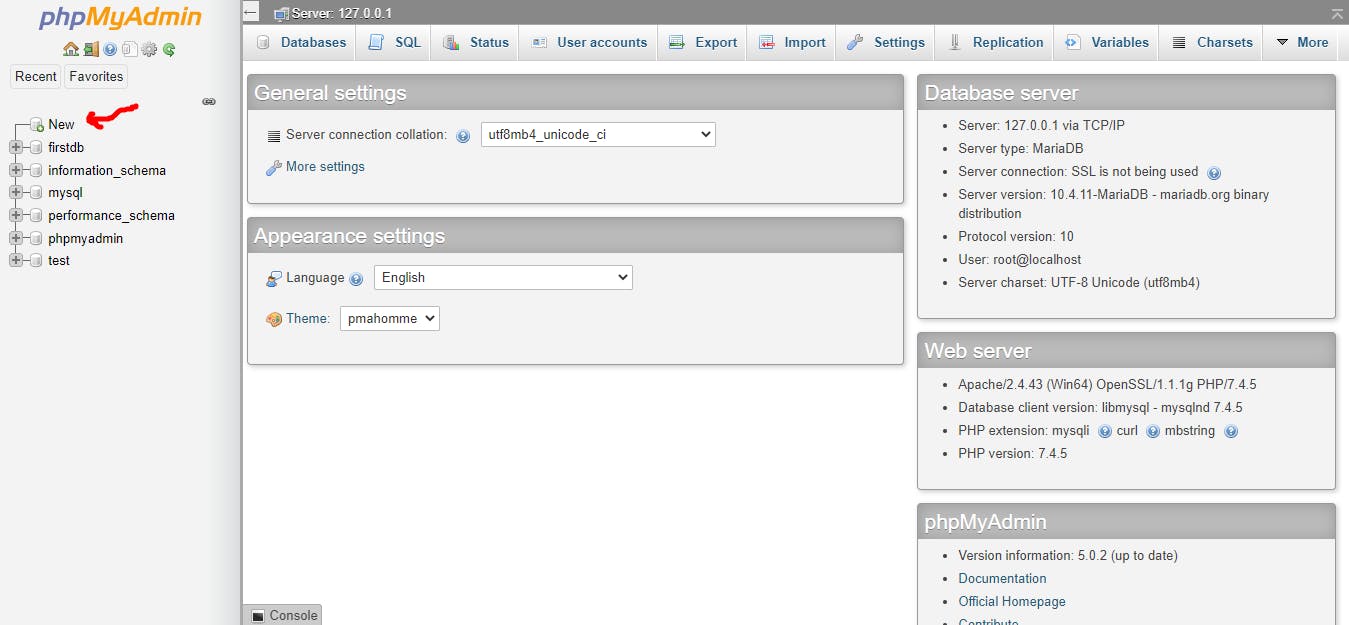
Open your browser and go to localhost/phpmyadmin. On the left hand side where we have a list of databases, you'll see a + New option. Click it.
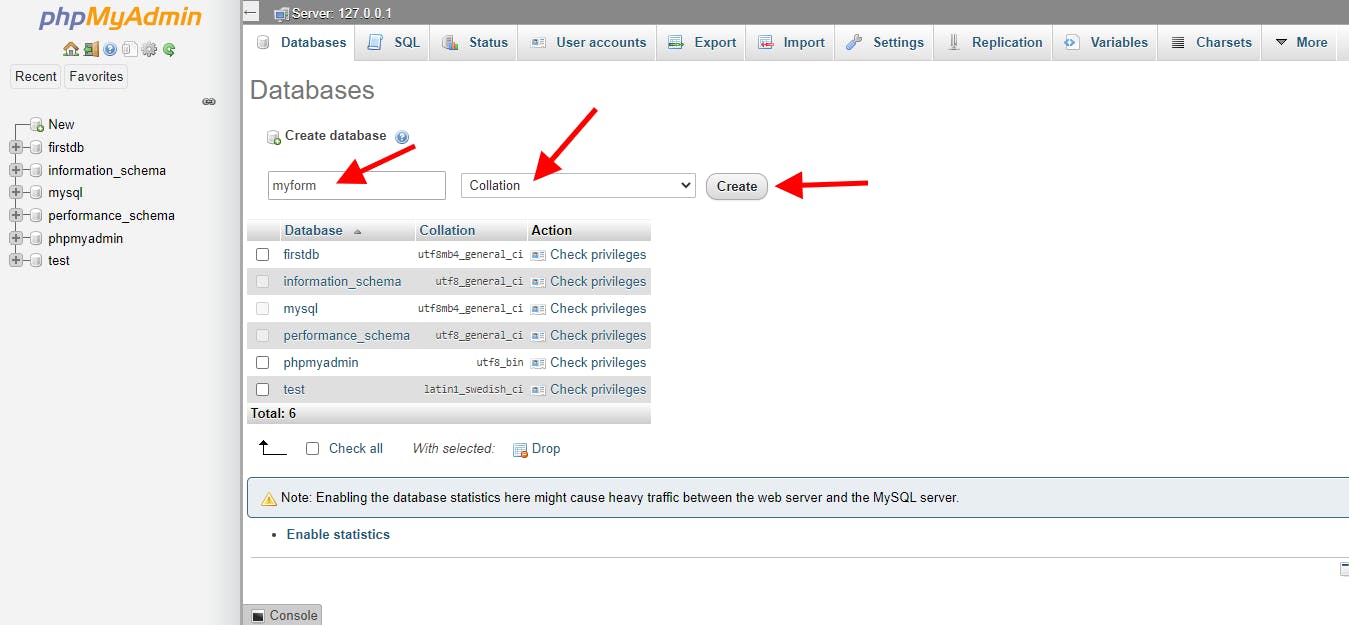
Now give your database a name, select type and then click create. In this case, we'll name our database 'myform'
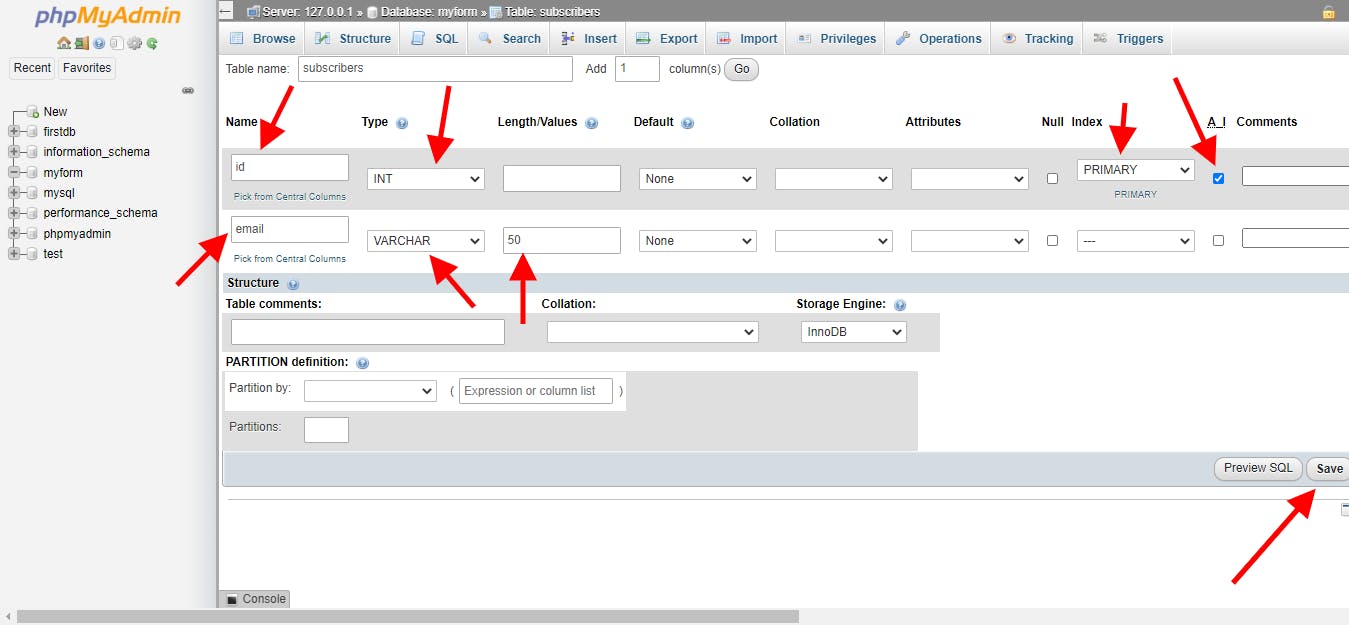
Your new db should appear on the left has menu along with the others. Now click your db and then select, create new table and give your table a name. In this case, I'll name our table 'subscribers' and set 'number of columns' to '2' because we are only submitting one value per row. The first column will be used as index.
Adjust table settings as shown below
Now your datatable is ready. Let us head back to our php file.
Creating a mySQL connection
Now we will use PHP method for creating a db connection. Our hostname is 'localhost', username is an empty string, password is 'root' and dbName is 'myform'
<?php
  // get value of email on submit
  $email = $_POST['email'];

  //database details

  $dbhost = "localhost";
  $dbusername = "";
  $dbpassword = "root";
  $tablename = "myform";

  // Attempt a MySQL connection.
  $sqlconn = new mysqli($dbhost, $dbusername, $dbpassword, $tablename);

  // Check if connection was successful and return an error message if otherwise
  if($sqlconn === false){
    die("ERROR: Couldn't connect to database. " . $mysqli->connect_error);
  } else {

  // mySQL query execution to submit data
  $sql = "INSERT INTO subscribers (email) VALUES ('$email')";

  if($sqlconn->query($sql) === true){
   echo "Submission successful";
  } else{
   echo "ERROR: Could not execute $sql. " . $mysqli->error;
  }

  // Close the connection
  $sqlconn->close();
  }
?>
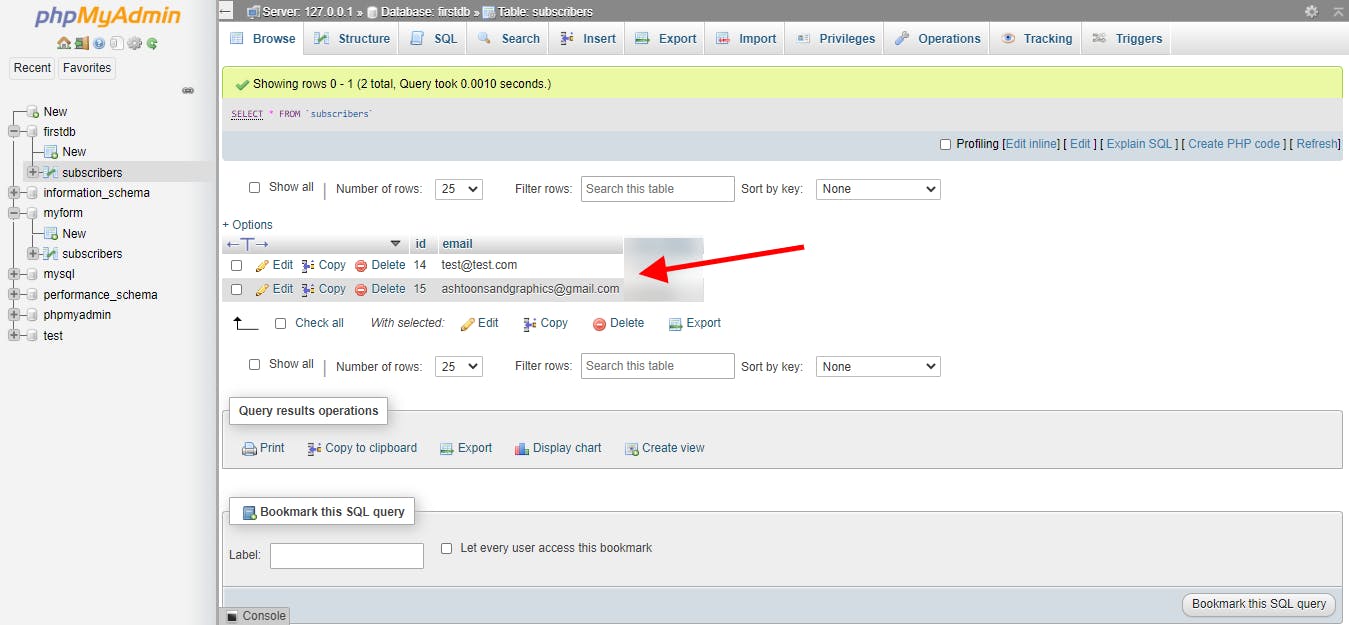
This should work now, submitting your html should successfully send the email to the database. You should see something like this
Now we are all set, our app is working locally! What next?
Adding jQuery Ajax
Now, If you noticed, our form redirects to form.php which is a completely empty page asides the success/error message displayed... Bad UX of course so what do we do? JQuery to the rescue. Create a new file and name it whatever you like; in this case, 'ajax.js'.
Now, add a script tag just below the body tag to your page and link it to your js file. Add jQuery cdn just above your ajax.js script:
<script src="https://ajax.googleapis.com/ajax/libs/jquery/3.3.1/jquery.min.js"></script>
Open up your js file and write the following codes in it.
$(function() {
  $('form').submit(function(e) {

    //prevent default form submission
    e.preventDefault();

   //ajax form submission
      $.ajax({
          type: 'POST',
          url: 'form.php',
          data: $(this).serialize(),
          success: (message) => {
           // add an action to be carried out when submission is successful
            alert(`${message}`)
          },
          // add an action to be carried out when submission is successful
          error: (error) => {
            alert(`${error}`)
          }
      })
  });
})
Now our form will no longer refresh page because ajax does the form submission asynchronously in the background.
Deploying your app to heroku
Now that we have our app working locally, we can move it to a live server and connect it with a remote database.
For this purpose, we can make use of Heroku and JawsDB. A detailed guide on how to setup Heroku and JawsDB is available in the Heroku documentation.